Showing posts with label recipes. Show all posts

Sunday, 14 April 2013

The Pleasures of Pinning

I suspect it was one of the bloggers I follow who led me to discover Pinterest a couple of years ago. I don't really remember just how it happened that I got started; I was so taken with the idea of 'curating' my own boards. "Yes, but how is it different from bookmarking favourite sites?" I was asked by a friend when I first tried to explain this (at that time) new enthusiasm. "Well for a start there are thumbnails which I find easier to scan through than URLs or phrases and I can follow other users' boards based on the same interests as mine and I find that leads me to sites in ways that Google doesn't." Pinterest has come a long way since then and the little red P button pops up on websites all over the 'net.
I suppose I could have easily entitled this post The Problems of Pinning and talked about the copyright issues - I have had images from this blog pinned and the first I have realised this is when I notice a spike in views of a particular post and pinterest shows on the list of traffic sources.
It is all too easy to keep pinning stuff to read later without checking the original web source, so it doesn't always encourage in depth reading. I am only just getting my magazine clipping habit under control and I seem to have acquired a digital version. Like any other diet, a steady diet of inspiration does you good only if you digest it.
With this in mind, I decided to put some of my pins to  practical use and review or edit my boards. Three bananas in the fruit bowl were getting blacker by the day, challenging me to do something wonderful with them, when I remembered pinning a recipe for Banana Bread.
Even though reading through the ingredients, at first it seemed undo-able with such a US bias, after reading on through the comments and applying a little culinary commonsense, I decided to carry on. The results were great. It turned out to be one of those 'disappearing' cakes though to be honest, most cakes are around here.
I made the following substitions/adjustments
  • For the applesauce I simply added the same quantity of sunflower oil (which I was using for the oil ingredient anyway)
  • For the buttermilk I used half milk, half natural yoghurt
  • For the lemon juice, which I didn't have, I used nothing. As it is mainly to stop the bananas from going brown I got everything else ready first and then mashed the bananas. As they are in a cake batter to be baked would it really matter if they discoloured a little before being cooked?
  • The oven temperature would be 175 deg C.
  • I used 2 small loaf tins 12 X 22 cm and it took 45 minutes before the cakes passed the "skewer comes out clean" test.
  • I stuck to the cup measures as most of my measuring jugs have cup markings at 8 fl oz. Even if US cup measures were any different, because all the ingredients are measured in cups, the important ratio would be maintained.
  • I added half a teaspoon of cardamom powder simply because I have had a bit of a thing for cardamom ever since I had  wonderful Turkish coffee last time I was in Adelaide. I could have used a little more.
Is it the best banana bread ever? Can't say as I haven't made it very often before but I will be checking out the local farmshop to see if they have any age-ing bananas so I don't have to wait too long for them to go brown/black and soft.
Does it keep well? Who knows!

I'm also grateful to Pinterest for helping me to wear my favourite jeans again. (This is in no way related to the cake recipes of course.)
Firstly for the idea of sewing elastic into the back of the waistband to stop them gaping. This is a problem I often find with jeans and trousers so I was glad to give this a try.
And it works and is very comfortable. I made sure not to stitch over the centre back belt loop so I can still wear a belt if I want to. At least now I don't have to.
The other problem was the zip not staying up. This was a problem right from the start and had I not bought them and then gone to Oz for two months I would have returned them to the store. By the time I got back, the return-by date had gone and I had resigned myself to wearing thigh length shirts and sweaters. Then I found this idea of using the ring from a keyring through the slider so that it could be slipped over the button and stay up. I suppose you could also use a loop of  strong yarn for this.
Both of them are "why didn't I think of that" ideas and I am very glad that somebody else did and passed them on.
So thanks Pinterest, for the help and the fun.


Sunday, 7 April 2013

A Spot of Afternoon Tea

If you were dieting to lose weight, what would be one thing most likely to break your resolve? Several people I know say  it would be a bacon sandwich. For me, a proper afternoon tea would be a strong contender.
Even though the weather has been sunny and mild, showing that spring might be ready to creep out from under Mother Nature's winter coat, on Thursday it was snowing and on Friday it was overcast with that biting wind we have had to put up with for weeks now.  With friends due to drop by mid-afternoon, afternoon tea by the fire seemed a great idea.
I love making scones. They were the first thing I entered in the junior cookery section of the local show. I was thrilled to have won first prize and even more so when I heard that the judge had said to the attending steward that had those scones been entered in the open section she would have given them first prize there too. What a boost to my emerging culinary confidence, especially as it was only the second time I had made scones, the first being in a Home Science lesson at school some few weeks earlier. I would like to be able to say it was all onwards and upwards from that day on but I have had some spectacular failures since. I'm not sure how it is possible to stuff up such a simple process but I have proved it possible. So probably the real reason that I love making scones is that I love eating them. I have tried lots of different recipes including Lemonade Scones but this time I decided to try Paul Hollywood's recipe. I have never used strong bread flour for scones before but they turned out a treat. With strawberry jam and clotted cream at the ready, preparations were coming along nicely.
It occurred to me that not everyone has a sweet tooth (how can that be, you may well ask) and I had heard such good things about the savoury cream tea at The Anvil Tearoom that I thought I could try to create my version of that. I began with cheese scones based on a recipe I have used for ages and taken from a booklet from a local flour mill.
Then I thought about what to spread on them. Parsley butter seemed a good idea.
As well as the obvious chopped herbs and butter, I always add a few drops of either Maggi Seasoning or Worcestershire sauce for extra savouriness. Then I thought, what goes better with cheese than a bit of chutney so I made another spread by combining roughly equal quantities of marscapone and tomato chutney.

 So two batches of scones  were cooling on wire racks with only one fairly negligible mishap (see below) and the tray of spreads was ready. .
Clockwise from top slightly left,
  • Strawberry Jam
  • Clotted cream
  • Herb butter
  • Chutney cream cheese spread
  • Butter (for those who might want the indulgent experience of butter and jam and cream)

HeWhoChopsTheWood made sure the fire was going.
And such a good time was had that I forgot about photographs until it was all over. Eat first then think about photos - I've done this before, haven't I? To be fair I wouldn't have thought dashing about with a camera, worrying about blog pictures was very conducive to being a considerate hostess so I'm not apologising for the lack of a picture of all the scones and tea things lovely though it may well have been. It was wonderful to catch up with friends and enjoy the warmth of the fire in what I hope marks the end of the bitterly cold weather.
Cheese scone recipe and the 'negligible mishap' follow:

Thursday, 7 March 2013

When life hands you lemons..

..make lemonade. Or so the saying goes. It's not really the season to be enjoying lemonade but there are endless possibilities for the irresistible bargain of a kilo of unwaxed lemons I found for 79p in the supermarket last week. My first thought was to make some preserved lemons, having enjoyed Yotam Ottolenghi's series  Mediterranean Feast on Channel 4. I have never tried this before  let alone made any recipes in which they feature but with my passion for anything lemon flavoured or lemon scented it seemed something well worth a try. I still have a few weeks to go before they are ready so I will resist the urge to share with you until I know just how successful the endeavour has been.
Meanwhile I can share something I know to be a success, lemon tart. This recipe for one of my childhood favourites is one of my mother's. It is very easy, with a simple list of ingredients and produces the tangiest dessert.


Easy Lemon Tart

You will need:
For the pastry case(s)
  • One batch of your favourite recipe,(or mine ) for sweet short crust pastry. Scale it to use about 230g - 250g of flour as this makes enough pastry cases for the quantity of filling.
For the filling
  • One lemon
  • One cooking apple ( not too large)
  • One egg
  • One cup of  caster sugar ( 200g if you are weighing)
 Oven: 175°C
Tin: 24cm flan or pie tin to make one large tart. 
(I used a Yorkshire pudding tin to make 4 small  9cm tarts and also a 18cm tart plate.)
 

  You will need to:
  1. Blind bake the pastry case or cases.Make sure they are placed on oven trays or cookie slides before adding the filling.
  2. Zest the lemon. If you haven't got a lemon zester, use a grater to carefully take off the zest. You don't want the white pith, just the lovely, fragrant, oil-laden,yellow zest.
  3. Juice the lemon.
  4. Peel, core and coarsely chop the apple.
  5. Blitz the zest, juice, apple, egg and sugar together in a food processor or liquidiser or use a wand blender. Without any of these gadgets, you could try finely grating the apple and then beating all the ingredients together until the sugar is dissolved.
  6. Pour the mixture into the tart cases and put in the oven preheated to 175° C.
  7. After about 30 minutes see if they pass the 'wobble and see' test. Gently shake the tray and see if the filling is set. Small tarts will have the filling completely set - so no wobble. Larger ones may need a little longer so try again after five minutes. A slight wobble right in the centre is fine but the filling should be set around the edge.
  8. Leave to cool and set. All being well, the filling should be firm enough not to flow when the tart is cut and the pastry base will be crisp and not soggy.

Notes
This filling is deliciously tangy but is best appreciated when the filling to pastry ratio is just right and not too deep. It also goes really well with cream. Far be it from me to jeopardise any Lenten abstinence or as yet unbroken New Year's resolutions - I'm just saying, that's all.
I find using the Yorkshire pudding pan to make 9cm tarts, produces a nice dessert sized tart.  To line them I use my largest round cookie cutter then roll the pastry circles a little more so they fit.

Now you might think that having yielded both its juice and its zest that the lemon has given all it has to give. Not quite; put the lemon halves in a microwaveable dish with about half a cupful of water and microwave on full power for a minute and a half. Leave in the microwave for a further five minutes before removing the dish. You can then wipe out the microwave with a damp cloth and any spills and splashes will come away easily. Now you can discard the lemon!

Wednesday, 23 January 2013

A Bibliophile in the Kitchen

One of the blessings of living in a much extended house is that  little nooks get created  and one of these in the kitchen is the right size for a book case. When eventually a bookcase was going spare and I can't imagine how that happened, I decided to collect up all the books we had on food or recipes, naturally doing a cull and consigning some to Oxfam, and then setting all the remainder along with folders of clippings from magazines and appliance leaflets on the shelves - organised and all in one place.
Like many collectors of cookery books, I found that for many of the books I had, there would be only one or two recipes that I had tried and used again and would want to keep.There were some I had never made anything from and felt now it was unlikely I ever would and there were others that may have had a place in our culinary lives at one time but no longer did. But it was looking through all of these that I realised how much recipe books encapsulate domestic history even over the few decades that I have been collecting them.When you look beyond the element of instructions for how to make stuff, you find all kinds of indications of the era in which they were written; everything from the amount and style of illustration - or lack of it - the layout of the text, the selection of dishes and ingredients and utensils, and finally, on reflection what is absent that would be taken for granted in a contemporary book.

Looking along the cookery book shelves in any bookshop high street or online,  most of the recent releases are either related to a television series, a celebrity cook/chef/restaurant, a new diet, a kitchen gadget or else is limited to a particular course or fad. (Who, apart from a professional confectioner,  could possibly need 50 recipes for macaroons let alone 500 for cupcakes?) My collection began in South Australia with a book that had all the weight and almost the scope of an encyclopedia. It took me from a flat-sharing singleton to a young wife, supporting me with recipes for casseroles and desserts to Christmas cake and a wonderful flour-less Chocolate Almond Torte that certainly helped establish my culinary credibility both with my  younger cousins in-law and in my own confidence.

I thought it would be interesting to step back a generation and get Mum's experiences with cookbooks.  She reminded me that she had a recipe drawer and besides an exercise book with recipes she had written down and envelopes of newspaper and magazine clippings ( just like me!) she had the classics of her time and location; the Green and Gold Cook book - now 90 years old, and the Barossa Cookery Book (oh, I remember that cover picture!) first published in 1917 and still available! Both of these books had obviously been around for sometime when Mum set up home but may be fads and fashions didn't fly past so quickly then. Will Nigelissima still be available (apart from in charity shops) even in in five years' time, I wonder? Follow the link and check out the chapters in the Green and gold book - Invalid Cookery and Laundry tips and you will see what I mean about encapsulating domestic history. It is interesting to note that both of these books were compiled as fund raisers and the recipes submitted by home cooks. Both were hugely popular and widely referred to. Mum and I also talked about the kinds of recipes she had collected and she said that she was always interested in new recipes for cakes, biscuits and desserts. Home baking featured much more in her culinary life - we rarely had store bought cake,  there were always home-made biscuits (not "cookies") in the tin.  There were more occasions out of the home where it was required to produce something home-made - cake stalls and plates of afternoon tea or supper. At a time when marriage marked the point when most young women left their family home, they learned the basics of putting meat and two veg on the table from their mothers rather than from books. We expect a wider range of offerings for our main meals I think. I was struck by Mum's remark that you wouldn't have had a whole book devoted to Salads. Salads were simply something on the side and the scope for ingredients much more limited.

As for style, isn't it enchanting when the text reads like someone standing next to you telling you what to do? Something like "Boil three pounds of potatoes, bruise and work them with two ounces of butter and as much milk as will make them pass through a colander." I have to say though that in practical terms the current style of setting out a list of ingredients followed by the numbered steps is much easier to work from. When I am writing down a recipe of my own in my notebook I list the ingredients down the left side of the page in the order in which they are used and simply bracket any together like 'sugar' and 'butter' in many cakes and put the instruction for then on the right -'cream'. This keeps writing  to a minimum but is not so easy to replicate digitally.

So should flames or flood waters come lapping and I had the luxury of saving just one handful what would they be? It would have to be my three red books; the little binder of family recipes my mother compiled for me when I got married, my own notebook in which I have pasted tried and tested recipes clipped from magazines and written down some of my own successes and recipes from borrowed books and finally the cookbook which I have used the most, the NMAA Cooks.
This is also a book compiled of recipes from home cooks as a fund raiser. Originally published in the mid-70s the range of recipes reflects a population of established Australians and  post-war European migrants with little of the Asian influence that was just beginning. It comprehensively covered a range of things the editors thought young families would find useful. No invalid cookery this time but a brilliant recipe for playdough and details for how Dad could produce the Sunday roast.The spiral bound format that means open pages stay flat is so practical - if only I had established the habit of slipping the open book inside a plastic bag while cooking, right from the start.

What coincidence brought a blog post entitled the Just One Cookbook Project into my Reader on the morning I wanted to complete this post? Oh dear! The binder and my notebook wouldn't really count, would they? I mean they are really just a binder and an exercise book that have recipes in them, aren't they? Besides cutting back so drastically might just be the excuse to start over with a new collection. I am a self-confessed bibliophile after all.

Friday, 21 December 2012

Something savoury

The whole idea of tradition runs rife at Christmas, don't you think? Most families have their own little celebrations to be replicated but for us the last few years have seen a run of 'one-off' Christmases with a departure from anything we had seen and done before. While learning from this that what matters is what happens, whether or not it has happened many times before, and to make the most of each moment and those you spend it with, I found myself nostalgically turning to the recipe folder my mother had compiled for me when I first set up home. I knew that in there I would find some of my childhood seasonal favourites and sure enough there were some of the biscuits and slices she used to bake in large quantities. What caught my eye though was a recipe, tucked away at the back under 'Sundries.' Flippies! How could I have forgotten about flippies for so long; it must be years since I made them.

Growing up in a time and place where there were no supermarkets let alone aisles of packs of salty snacks in all manner of flavours and the only flavour of cracker biscuits stocked by the grocer was 'plain',  I loved these cheese flavoured  little biscuits. They were quite popular in the family as it wasn't only my mother who made them. It is quite a retro recipe but I couldn't resist having a go and decided to stick as close to the original as I could even though little tweaks and updates kept springing to mind. If you have access to those supermarket aisles and all the flavours, shapes and constituents why should you bother? Allow me to suggest:
  • you have some leftover cheese that will only lurk in the back of the fridge forgotten, especially once the Christmas cheeseboard is unwrapped.
  • you have read the ingredients list on the back of some of those supermarket packs and are none too impressed by all the things you'd never really thought of as food before.
  • with school closed for the winter break, you have some extra hands to help with cutting out but you just can't face the thought of another batch of sugar-laden cookies.
  • stacked into an airtight jar, they make a good 'home-made' gift.
  • the smell as they come out of the oven beats opening any packet
Convinced? Here's the recipe in modern metric terms.

Flippies
You will need:
  • 20g butter
  • 330g flour
  • 1/2 teaspoon salt
  • 1/2 teaspoon cayenne*
  • 75g cheese**
Oven Temperature 220° C
Cookie sheets

You need to:

  1. Make up the dough before you switch the oven on to heat.
  2. Place the butter in a measuring jug and top up with enough boiling water to make 220ml.
  3. Mix together the flour, salt and cayenne in a large bowl.
  4. Grate the cheese and mix into the dry ingredients. Make a well in the centre and pour in the melted butter and hot water.
  5. Mix just enough to make a smooth  ball of dough then cover with a sprinkling of flour and set aside to cool.
  6. Once the dough is cool and workable, preheat the oven to 220° C, lightly grease some cookie slides and flour the work top.
  7. Roll the dough out very thinly. The original recipe says wafer thin but I think our modern familiarity with filo pastry might have hiked up our notion of wafer-thin. Slightly less than the thickness of a 5 pence piece will do.
  8. Cut out the biscuits using the very smallest round cutter or cocktail cutters if you have them. There is quite a lot of dough to cut out and I can see why the cutting utensil of choice in the family became a knife to simply cut the dough into squares or diamonds. This is not a television bake-off so they don't all have to be the same size or shape. Aiming for the hand-crafted look, you can even cook the larger edge pieces as tasters' perks.
  9. Place the shapes on the greased cookie sheet and bake in the oven for 5-7 minutes. 
  10. Loosen the biscuits on the tray as soon as you take them out and leave them to cool. They keep well in an airtight tine or jar. Serve them as nibbles with drinks, slightly larger ones can be served with dips.  
* Pairing cheese with cayenne seemed almost obligatory back when this recipe was written. It is not a spice that seems much in use now so you could substitute a mild chilli powder or  paprika if you have either of those to hand and adjust the quantity accordingly.
** I used a tangy cheddar but any cheeses hard enough to grate would probably work well. I was tempted to put in some Parmesan but that wasn't around when I first fell for these and I was out to feast on nostalgia!

Sometimes these puff up in the oven in some wonder of culinary magic science which I  clearly can't replicate on demand. I wonder if that is how they came by their name.


Saturday, 8 December 2012

Festive Friands

And for those of you not familiar with these little cakes that is not a typo!
I first encountered  friands while watching Better Homes and Gardens during a trip to Oz a few years ago and I have made them several times since.  I really hope they are not part of the  current wave of small cake trends; muffins, cupcakes, cake pops, whoopie pies, etc. With their light but moist consistency, ground nuts and fruit they deserve to be stalwarts of a baking repertoire. Typically they are not adorned with frosting - they don't need it- and although with their butter and sugar content, they, and any other cakes, are not going to appear on any healthy diet sheet, let's consider a little damage limitation here.

The classic shape is this rather elegant oval but lacking the moulds for that, I always used a muffin pan to bake them. Recently however, a silicone  friand pan arrived in the post as a surprise present so I was delighted to have the excuse to bake some.  The original recipe used blueberries and lemon zest and I have made them with blackcurrants and other berry fruits. I thought it was time to adapt the recipe to a more seasonal theme.

 Spiced Cranberry Friands
Ingredients:
  • 180g unsalted butter
  • 125 ground almonds
  • 80g plain flour
  • 250g icing sugar
  • 2 teaspoons mixed spice
  • 6 egg whites
  • 100g dried cranberries
  • juice of a clementine
  • 1 teaspoon vanilla extract
Tin: *12 small cake moulds, either a muffin pan, mini-loaf tins or mini-cake tins. Each should hold 1/2 cup (4fl.oz or approx 125 ml)
Oven temperature:190 deg C

You need to:
  1. Butter the moulds well and set the oven to 190 deg to heat up.
  2. Mix the cranberries with the clementine juice in a small bowl, microwave for 30 seconds and leave to cool and plump up. (If you are using fresh cranberries, you can skip this step and just increase the amount of berries to 140g.)
  3. Melt the butter in a small saucepan over low heat. Let it bubble away for 5 minutes, keeping an eye on it. Resist the urge to be getting on with the rest of the preparation. This step somewhat clarifies the butter, driving out liquid. It will turn a deeper gold colour and also enriches the flavour of the friands.
  4. Place the  ground almonds  in a large bowl and sift in the flour, icing sugar and spice. Mix well together. 
  5. In another bowl whisk the egg whites until frothy - no need to go as far as soft peaks. Stir them into the almond, sugar, flour mixture. 
  6. Stir in the butter and vanilla extract. Use a folding action and stir just enough to ensure all is combined.
  7. Set aside a few of the berries to scatter on top of each friand and fold the rest into the mixture.
  8. Fill each mould about 3/4 full with batter and place a few of the reserved berries on top of each cake.
  9. Bake in the centre of the oven for 25-30 minutes. They should be slightly risen ( I know, no raising agent just whisked egg whites!) golden brown and spring back when lightly pressed.
  10. Take them out and let them cool in the tins for 5-10 minutes before turning them out on a cake rack. 

Notes:
As I said before these don't need icing. If you are serving them as part of a festive feast and their unadorned tops seem to be rebuking you with "couldn't be bothered" negligence, then drift on a light sifting of icing sugar or the merest artistic drizzle of chocolate. 
You could also enhance the almond flavour with a few drops of almond essence or almond flavoured liqueur added with the vanilla.

*I have yet to see the oval moulds here in any cookware shop, but reasonably priced silicone moulds can be found on line here. 

And as for all those leftover egg yolks, now is a good time to have those because you could use them to:
  • make enriched short crust pastry for mince pies
  • glaze savoury pastries like sausage rolls
  • make mayonnaise to use in turkey sandwiches or  to mix with chopped herbs as the basis for dips
  • add an extra yolk to make scrambled eggs a little richer
  • freeze them for later
  • and if the thought of any more cooking has you feeling frazzled, search the internet for homemade hair conditioner recipes and treat yourself to a little pampering.

Sunday, 21 October 2012

Seasonal Soup

Almost any hot soup would be welcome as the days grow colder and greyer but with the preparation for Halloween and bonfire night in full swing then Pumpkin Soup seems to be the soup of the day.
And it is here that I have to confess that the soup that my family and friends have been sipping for years as Pumpkin Soup has not actually had pumpkin in it, rather the principal ingredient has been squash, either butternut or the lovely silver grey Crown Prince when I can find it in the shops. I find the flavour, colour and texture of those squashes much richer than any vegetable sold as pumpkin here. As for the recipe, I always seem to need to have the NMAA Cooks - Recipes for Busy Mothers open at recipe 213 to make this soup.

It is one of those pages whose ripples and splash marks bear testimony to a much-made recipe and pencil notes in the margin reflect the fact that the making of it is evolving. Quite why I need the book open at that page is a mystery to me now, I seem to have diverged from the original. It reminds me of the anecdote about the family who pleaded with one member to reveal the recipe for a much loved cake. Eventually at a family gathering the aunt whose specialty this cake was, produced a fragile, yellowed and obviously aged newspaper cutting. The bickering over who should have first chance to copy the recipe was stopped when the aunt said " Well yes, that's the recipe, but it is not how I make it."
So it is with my soup recipe. I seem to need the original to hand to remind me how I have adjusted it over the years.

Autumn Squash Soup
 Ingredients:
  • 500g prepared butternut squash, peeled, de-seeded and chopped
  • one leek
  • 2 cloves garlic
  • 40g butter 
  • half teaspoon ground cloves
  • tabasco sauce
  • 250 ml vegetable or chicken stock
  • 400 ml milk.
  • Juice of half a lemon
 You need to:
  1.  In a large saucepan melt the butter gently.
  2. Wash and slice the leek, crush the garlic and add to the butter. Stir for a couple of minutes then add the prepared squash. Stir well then pop the lid on the pan and let the vegetables, sweat in the butter to soften for five  minutes. 
  3. Add the cloves and some drops of Tabasco sauce, along with salt and pepper.
  4. Add the stock. It could be made with a stock cube or as I often do, bouillon powder but it would also be a good way to use any good chicken or vegetable stock you may have to hand. Stir and cover again, then let it simmer gently until the vegetables are soft. Should the pan start to dry out, you can top up with some of the milk.
  5. Once the squash is soft, puree the mixture. It just so happens I have a liquidiser and use it as it gives the smoothest results but any blitzing gadget or even a sieve would be fine for this.
  6. You should now have a pretty thick puree, so rinse the pan and pour the soup back in. You will now adjust the thickness and seasoning. 
  7.  Gradually add milk and stir gently over a low heat until you have the thickness you prefer. 
  8. Add the juice of half a lemon. Taste and adjust the seasoning and 'heat' adding more Tabasco to taste.
  9. Serve garnished with whatever appeals; a swirl of creme fraiche, finely chopped chilli or coriander, croutons, perhaps.
This soup is just as good being sipped around the dinner table or served in mugs around a bonfire. There is also something, maybe in the cloves, the garlic or the Tabasco that has a somewhat restoring quality, useful when that tickle in the throat hints that you may be succumbing to a winter virus. 


Wednesday, 12 September 2012

Apple Cake, anyone?

Our apple crop is far from spectacular this year, so we will just have to make the most of those few we do have. No frozen juice or gleaming jars of chutney this year. I began collecting apple recipes ever since our first autumn here when I realised our four trees would present us with a harvest far beyond the scope of the tabletop fruit bowl. Some English counties seem to each have their own apple cake recipe but so far a Hampshire recipe has not come my way so I am going to presume the title for my cake, as it was made in Hampshire from apples which, so far as I know, may well be unique to this county. (see below)

Hampshire Apple Cake.
You will need:
  • About 250g of dessert apples
  • 125g unsalted butter
  • 150g caster sugar (plus extra for the topping)
  • 1 teaspoon vanilla extract
  • 1 lemon
  • 3 medium eggs
  • 1 rounded teaspoon baking powder
  • 3 tablespoons milk
  • ground cinnamon
(Please note that if, like me, you use the ingredients shot as a visual larder checklist that the lemon, baking powder, and milk are not included in this shot!)

Tin Size: 23cm     Oven Temperature: 180C, gas mark 4.

What you need to do:
  1. Preheat the oven.
  2. Prepare the tin and plan the cake's escape route. Cakes with a baked on topping are best lifted out of the tin rather than turned out. Either use a spring-form tin or else put a band of folded baking parchment across the base leaving long enough ends to be able to lift the cake out. Either way grease the tin and dust lightly with plain flour.
  3. Zest and juice the lemon.
  4. Cream the butter and the 150g castor sugar. Add the vanilla and lemon zest.
  5. Reserve about half of one of the egg whites in a dish at this stage, and beat in the rest of the eggs.
  6. Sift the flour and baking powder together and fold into the mixture. Then add the milk. Mix completely and set aside for ten minutes while you attend to the topping.
  7. Peel, core and slice the apples. Sprinkle with a little lemon juice to stop browning and set aside.
  8. Lightly whisk the reserved egg white. 
  9. On a plate, mix together approx 50g caster sugar and 2 teaspoons cinnamon. I also add a little extra vanilla kick here with some powdered vanilla I found in an Asian supermarket but it is not essential.
  10. Spoon the batter into the prepared tin. Then dunk the apple slices in the egg white, then in the spiced sugar and arrange them overlapping on the top of the cake. The egg white helps the sugar stick to the apple and adds a little crispness to the topping.
  11. Bake on the middle shelf for 50-60 minutes, until firm to the touch. Allow to cool for 5 minutes before lifting it out of the tin to cool on a rack.
Anyone who has been in a kitchen where apples are being cooked with cinnamon will know the smell is wonderful; layer in the elements of vanilla and lemon zest and it becomes heavenly. If you are  making this for guests, bake it just before they arrive. It would almost be mean, wouldn't it,  not to share the full olfactory experience and like most apple cakes it is so good served warm. Should you feel that some dairy unctuousness would not go amiss then by all means slip some creme fraiche or vanilla ice-cream on the side.

This is a good accompaniment to tea or coffee. It gives a good cake to fruit ratio. It is not however, one of those currently fashionable high-rise multilayer cakes, so tall that "if you slice me, I will have to lie down on the plate" but, to my mind, that is not necessarily a bad thing.
As for the apples I have used, we call them Our Own apples, not that the fruit from the Katy, James Grieves and Cox's Orange Pippin trees in our back garden has been scrumped, you understand; we simply haven't been able to work out just what variety they are. The tree was well established here when we moved in, leaning companionably over the front fence. Since there had been an apple orchard on the land across the road it could well be  a seedling. It has a pretty, flecked reddish skin with a fine russet overlay. The flesh is firm, white and juicy with a deliciously distinctive flavour. It is very early, usually ready to drop from the tree during the third week of August and like most early apples doesn't keep for very long. They make the most refreshing juice and most people who have tasted them are very enthusiastic. A great accompaniment to cheese.
Trying to work out just what they might be, I have gone to various Apple Day events but have tasted none quite like these. I started with Blackmoor Open Day. Later I tried the Apple Affair event at West Dean and then visited Brogdale Hall and RHS Wisley. All of them are well worth a visit if you are considering growing apples or even if you simply like eating them - lots of great advice and fantastic tasting opportunities and recipes. The apple identifying experts I asked suggested either Ross Non-pareil  but that is a later variety, or St Edmund's Russet which comes closest but the flavour isn't quite the same. Perhaps it has St Edmund's Russet in its parentage.
Not knowing what I would replace the tree with should disaster strike, I decided that propagating 'an heir and a spare' might be a good idea. I don't have the grafting skills for this but in early 2000 I found someone who did, Mr House at Family Trees Nursery. I  took him some pencil-thick wood and he grafted two onto dwarf root stocks which are now well on their way to being good producers - weather and my rather suspect pruning skills permitting.
So my visits didn't come up with a convincing answer but I am grateful for the quest.  I would thoroughly recommend going to any of the heritage orchards and places I have mentioned and checking out local Apple Day events. Consider growing something you will never find in a supermarket. Having the chance to pick and eat even a few apples from your own tub-grown tree is enough to bring out the Eve in all of us. 
I have reined in my quest to know just exactly what they are now; in truth I would rather think that they are indeed simply Our Own.


Tuesday, 24 July 2012

Easy Jam

It looks like being a funny old summer for fruit. We could blame the weird weather, I guess or we can be thankful for what little there is and make jam.

Yesterday, while hacking back the shrubbery, I noticed that the blueberry did have some fruit that the birds hadn't noticed so after all the shredding and sweeping up was finished, I fetched a bowl from the kitchen to see what berries I could harvest.

I came back to the kitchen with around 300g of blackcurrants, blueberries, raspberries, and a couple of alpine strawberries. (Had it all been raspberries, I admit they probably wouldn't have made it as far as the back porch.)

Time to make some jam.  This method is so quick that taking step by step photos would have more than doubled the effort. What follows is not so much a recipe but more like guidelines for quick, simple and delicious jam - ideal if:
  • you have never made jam before
  • you only have a small quantity of fruit or it doesn't match up with any recipe you have
  • you haven't got a lot of jars
  • you don't have a preserving pan - or can't be bothered hauling it out of the back of the cupboard
  • you don't eat a lot of jam 
  • you want some special jam for a special afternoon tea.
You will need some berry fruit and some sugar. I used jam sugar because I had some lurking in the larder and with the extra pectin in it, I could expect it to set firmly, but you could use ordinary granulated sugar.

 What you need to do 
  1. Pop 2 or 3 teaspoons in the freezer. These come in handy to test to see if the jam will set later on.
  2. Wash the fruit in a colander or sieve and gently shake the excess water away. Pick it over to remove anything you wouldn't want to eat - stalks, stems, leaves, damaged fruit.
  3. Weigh the fruit at this stage.
  4. Place the fruit in a saucepan over a gentle heat and let it simmer, stirring occasionally until it is soft. This will take five to ten minutes depending on how much fruit you have.
  5. Weigh off the sugar - an amount equal to the weight of the fruit.
  6. Take the pan off the heat and stir in the sugar until it is all dissloved.
  7. Put the pan back on the heat and turn it up higher to bring the jam to the boil. Keep stirring it - unless, of course, you want it to boil over and make a sticky mess!
  8. After a couple of minutes of boiling, start testing it to see if it will set. Take one of the teaspoons from the freezer and dip it into the jam to coat the spoon. Push your finger through the jam, along the bowl of the spoon. If the mixture wrinkles up in front of your finger and you find it leaves a clear trail behind it, then your jam is ready. If it is still too runny to do this then boil it a minute or two longer and try the cold spoon test again. (It is a good idea to take the pan off the heat while you do this, partly to stop it overcooking but mainly because your attention will be elsewhere for a few seconds and boiling jam has a habit of doing undesirable things if it is not watched.)
  9. If you have jars and a lot of jam then bottle it up making sure the jars have been sterilized and heated before ladling in the jam - but this method is about small quantities so most of the time I just spoon it into a pretty jar or bowl to put on the tea table. Give it time to cool and set and then tuck in. It tastes so much better than all but the most expensive shop bought jam that I have never had to worry about its keeping qualities.
Should you find that it hasn't set particularly well, use it as a topping for icecream or pancakes; it will still taste delicious. Small quantities like this are also a good way to experiment with added flavours. Adding shreds of dark red rose petals (minus the little bitter white bit at the base) to raspberry jam and star anise or a piece of cinnamon stick to blackcurrant jam (remove these spices after the simmer stage just before the sugar goes in) have been very worthwhile. Have fun and make some wonderful 'artisan' jam.

Meanwhile I am off to make scones to go with my jam - before it all disappears. After all, it looks like summer is here.


Thursday, 29 September 2011

Shirley Cake

Remember Molly Cake? I believe I introduced you back in February. Here then is her sister, Shirley Cake.
They are definitely related, both having softened dates running through their crumb but Shirley is the slightly more sophisticated, decidedly more decadent of the two. I have known 'Shirley' since I was a child and lately I have found myself feeling very nostalgic for cakes as they used to be. Maybe I have just been in the wrong tea-rooms and cake shops lately and I know one doesn't turn to cake to  seek dietary, nutritional virtue, but it seems to me that  stylized presentation is placed above all other considerations. The cakes themselves are often little more than bland platforms for disproportionate amounts of filling and  elaborate, brightly coloured frosting. So here then is a cake where the crumb is distinctive and the frosting is simply 'the icing on the cake'.


Shirley Cake
Ingredients
For the Cake
  • 70g stoned chopped dates
  • 50g walnuts chopped (plus extra for decoration)
  • 130g plain flour
  • 125g butter
  • 65g caster sugar
  • 1 egg
  • 1 teaspoon baking powder
  • 1 teaspoon bicarbonate of soda
  • 1 tablespoon golden syrup
Preheat the oven to 180C,  170C for a fan assisted oven.
Lightly butter and line a cake tin. I used a square 20cm x 20cm tin.

You will need to: 

  1. Mix the bicarbonate of soda with half a cup of warm water and add the chopped dates to soak.
  2. Beat the butter and sugar together until creamed and then add the golden syrup.
  3. Beat in the egg.
  4. Mix in the date/soda mixture.
  5. Sift together the flour and baking powder and stir into the mixture. 
  6. Pour the mix into the tin, level it and bake for 45 minutes. Use the skewer test to see if it is cooked properly.
  7. Allow to cool in the tin for 5 minutes before turning onto a cooling rack. When it is cool you can procede with the topping.
For the  topping.
Ingredients
  • 125g dark brown Muscovado sugar
  • 25g butter
  • 2 tablespoons milk
  •  1 teaspoon vanilla essence
You will need to:
  1. Put the sugar, butter and milk into a saucepan and stir over low heat until the butter has melted and the sugar has dissolved.
  2. Boil for 3 minutes.
  3. Take it off the heat and add the vanilla essence. Let it cool for a minute.
  4. Use a wooden spoon to beat the mixture until it begins to thicken. 
  5. Spread over the cooled cake and decorate with walnut halves.
 Tip:
 If you want the glossy, soft topping just like Mother used to make - and why wouldn't you? - then don't get distracted at the boiling stage and leave it any longer. Over beating will also make it matt and grainy (and I should know).

So when the evenings start to draw in and afternoon tea in front of the fire seems a very welcome idea then this is the kind of cake that would go down very well. Not all dark brown cakes have to be chocolate or coffee - there is scope for a dark caramel flavour too. Isn't that a comforting thought?


Friday, 24 June 2011

Just a bowl of cherries

According to an old song and an even older saying, that is what life is - just a bowl of cherries. At the moment  it  could well represent the amount of fruit that  the birds in our garden have been foiled from gobbling before it is properly ripe.
The cherries are a variety called Stella, a lusciously large, dark and juicy variety; at their sweetest and most delicious when picked fully ripe from the the tree. Well, that's how I like them. The pigeons are quite happy to harvest them when they are tiny, rock hard and bright green and the blackbirds only wait for the first hint of red. With the tree having the botanical name, Prunus Avium (translates from Latin as bird cherry) I suppose they feel entitled. As the person who carefully selected, planted and nurtured the tree, I feel entitled too. It is now too tall to net and the birds around here seem  as happy when surrounded by old CDs as any nineties DJ, so in order to salvage some fruit for us, I have resorted to covering some of the clusters with the legs of old tights as soon as the cherries start to turn colour. For several weeks it looks hideous on a tree that is almost in the middle of the garden but with even only a dozen or so branches weirdly clad in hosiery, we at least get some fruit to harvest. In fairness, more than the bowl above but not really enough to consider making jam. Just enough to enjoy fresh with a few to enjoy later. Making some tarts for the freezer seems a good idea. During the days when we used to be able to 'pick your own' in the cherry orchard up the road,  I copied out a recipe for a pudding that I have made and modified several times.  Never mind the posh name it had for the original recipe, it is really a Cherry and Almond Tart. If you don't care for the flavour of almonds then it can be adapted. See the notes below. Here then is its current incarnation.


Cherry and Almond Tart

You will need:
 For the pastry:
230g plain flour
half teaspoon salt
half teaspoon caster sugar
100g cold  unsalted butter cut into small pieces
45g lard or vegetable shortening
 50 ml (approx) of ice cold water.

For the filling:
250 g cherries
120g butter 
120g caster sugar 
120g ground almonds
2 tablespoons plain flour
2 eggs 
a few drops almond essence or almond liqueur (optional)

For the glaze:
120g icing sugar
2 teaspoons of water.

You will need to:
Make up the pastry by putting the flour ( mixed with the salt and sugar), butter and lard or shortening in a food processor and whizz till the mix resembles bread crumbs. No food processor? Then put the flour and fats into a large bowl and rub the mix between your thumbs and fingertips until it is thoroughly mixed and again, it looks like breadcrumbs when this has happened. Try to keep the mixture away from the warmth of the palms of your hands as much as possible. Now add the chilled water a small amount at time until there is just enough to hold the mix together. With a food processor, you can trickle the water in through the lid as the blade is running and you can see and switch off as soon as it makes one large lump. Without the processor you can use a table knife to cut the water little by little into the mix. Either way, quickly pat the finished dough into a thick circle, place in a bowl, cover with a damp cloth and pop it into the fridge for an hour. 

Prepare the filling. Mix together the butter and castor sugar until light and fluffy. Beat and add the eggs and almond essence. Mix well. Gradually add the flour and ground almonds. Set this batter aside and then wash, halve and stone the cherries.

Assemble the tart(s). Prehat the oven to 200 deg C. Put cookie sheets into heat as well.  Roll out the pastry to about half a cm thick. I had enough pastry and filling to make one 22cm tart and four smaller ones about 10 cm for which I used a Yorkshire pudding tray. Line the flan tins or pie plates with the pastry and let it rest for ten minutes. Then place the cherries cut side down over the base of the tarts. Pour the filling batter over the fruit and tap the tins sharply to encourage it to level out.  Place them on the heated cookie sheets in the oven. This helps the base to crisp. Bake for approx 30 minutes - slightly less for smaller tarts - until the filling has risen slightly and browned and the pastry is cooked. Remove from the oven and place on a wire rack. 

 To glaze: Sift the icing sugar and mix with the water to make a stiff paste. Spoon onto the tart while it is still hot from the oven and gently swirl with the back of the spoon or a pallette knife so that the icing spreads evenly over the top of the filling. Allow to set and cool. Enjoy!

 Freezer notes; Any surplus pastry dough will freeze well. I find it best to roll and cut out useful sized circles before freezing. Not only can you take out just what you need, but it thaws much faster and saves all the hassle of rolling and clearing up yet another time. 
 The baked tarts also freeze well but leave the glazing off  as it tends to go soggy when thawing and you loose the crisp sweet bite.  You could use boiling water to make the glaze to put on the thawed tarts. I like to freeze the 10cm size as they are ideal for a 'lazy' dessert and it is a comforting thought to have something reasonably impressive and practically table-ready for pudding. 

Don't like almond flavours? Well you can always leave out the essence or liqueur and substitute dessicated coconut for the ground almonds. Any devotee of the Cherry Ripe bar (and these head my Most Missed Oz Food list now that Vegemite is readily available here) will tell you that cherries and coconut are an inspired combination. And with that in mind you will probably want to figure a way to add an element of dark chocolate to the dessert. Perhaps an artistic drizzle of chocolate sauce, chocolate pastry base or some chocolate dipped cherries on the side.
Does this dessert deserve to be entitled Flan Danois? Mm, possibly.


Sunday, 19 June 2011

Cookies - Something old, Something new

 Here at The Hebe Bee, this is post number 50. 
Surely that is a milestone worth celebrating with a little treat. Let me share one with you. For very little effort you could make up a batch of Cranberry cookies and fill your kitchen with the most heavenly smell which is nearly (but not quite) as good as the taste.   As they cool and set, make a pot of your favourite brew - tea, coffee, hot chocolate, the choice is yours - and find someone to share a delicious moment.
As a child I never had 'cookies'. Absolutely true. Treats like these were called biscuits and most often they were home-made.  Do you find that nothing quite nourishes the inner child like something your mum used to make? I'll admit I'm not averse to shop bought cookies, but making my own means I can hit the ideal medium between the chewy texture of the five-in-a-bag cookie and the crisp crunch of the ones that my mother used to make.

The Something New in the post title refers to Flora Cuisine, the oil component in the following recipe. ( No, I am not being sponsored!) Some weeks back it was being promoted in a local supermarket and I was handed a sample to try. A little later, a recipe for cinnamon and raisin cookies appeared in an advertisement in another store's freebie magazine. This recipe is my tweak on that one. The Something Old is the  flavour combination of cranberries, cinnamon and orange which is a particular favourite of mine.

Cranberry, Orange and Cinnamon Cookies
 You will need:


  • 70g Flora Cuisine
  • 55g castor sugar
  • 100g soft brown sugar
  • 175g Self-raising Flour 
  • 1  medium egg
  • grated zest of an orange
  • 2 teaspoons cinnamon
  • 1 teaspoon of vanilla essence (or vanilla powder)
  • 90g dried cranberries
  • 1/2 teaspoon bicarbonate of soda
What you need to do: 
  1. Preheat the oven to 190 deg C. Lightly grease 2 cookie sheets. You could use the Flora Cuisine for this. 
  2. Sift together the flour, cinnamon and bicarb into a large bowl.
  3. Roughly chop about half the dried cranberries then add all 90g of them to the bowl.
  4. Beat the egg and add it. Then add all the remaining ingredients. It doesn't really matter about the order just place all the ingredients into the bowl and start to mix.
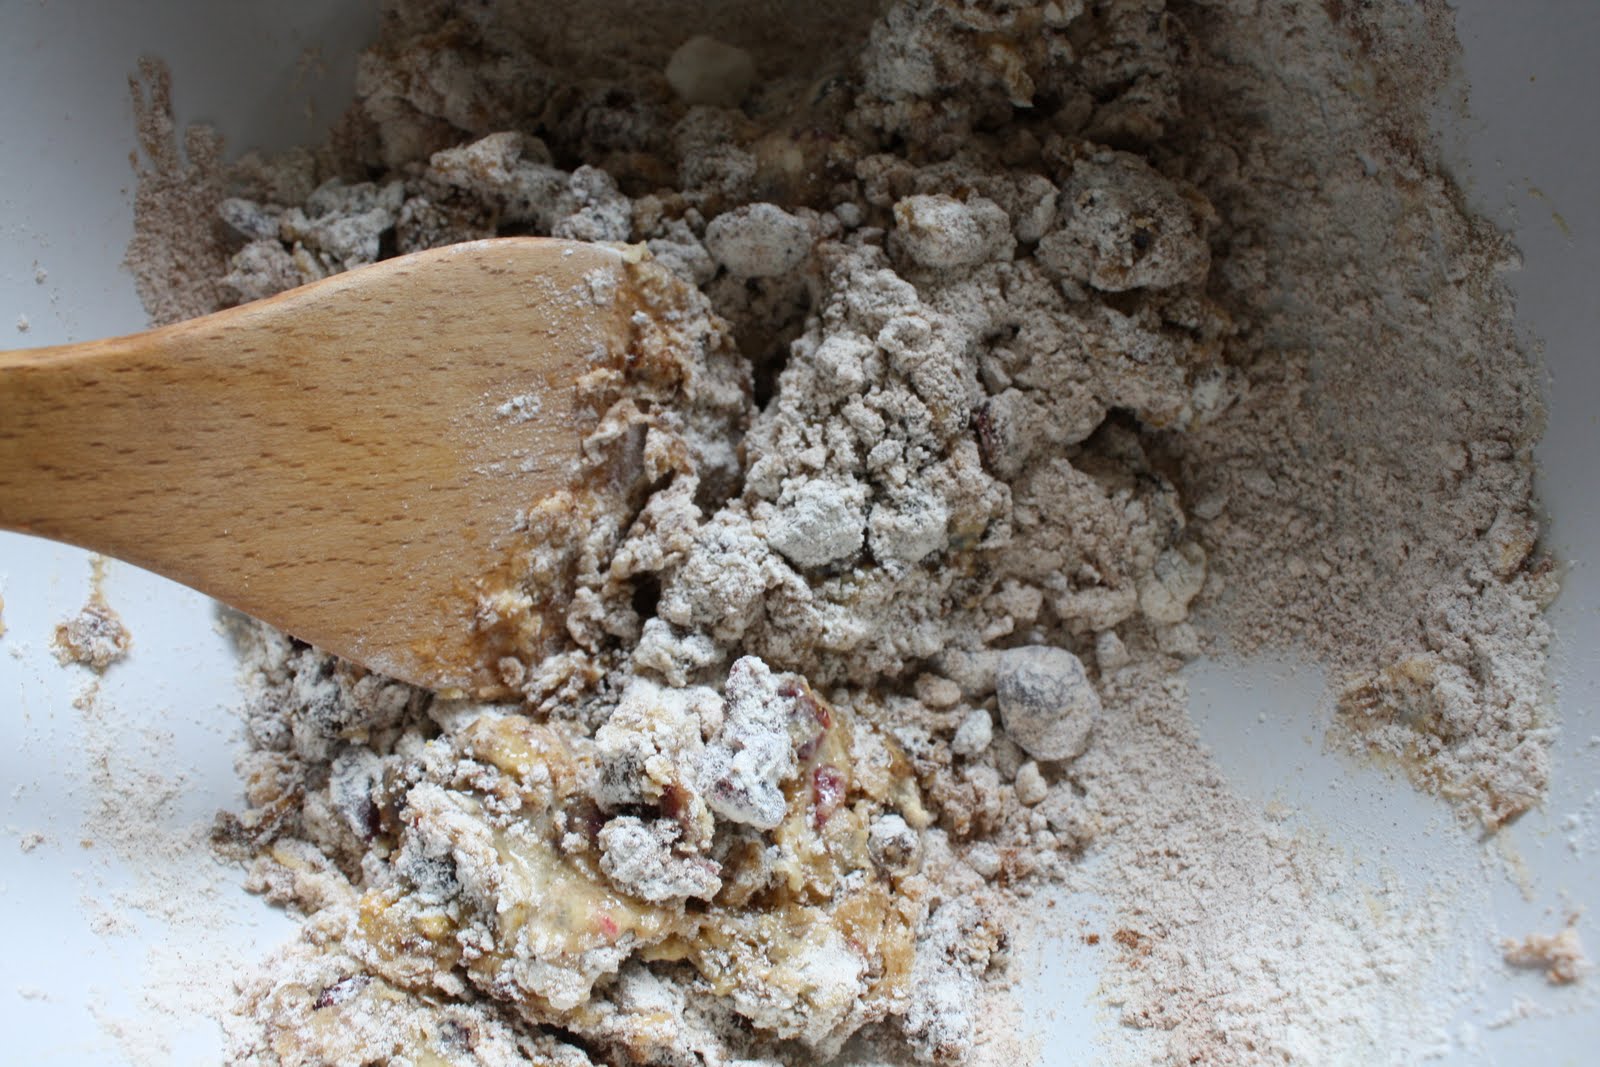
At first it seems far too dry to make into cookie dough.
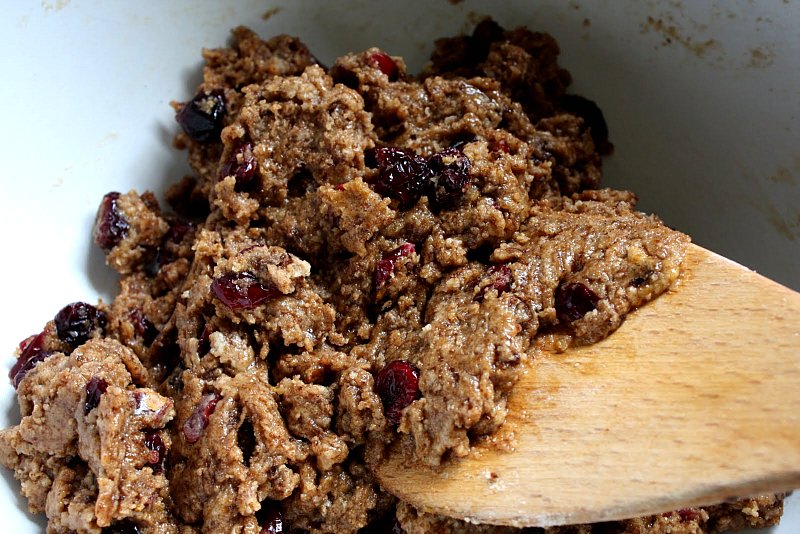
But keep mixing and eventually it all sticks together and a smoother, shinier dough studded with cranberries is ready to be dolloped onto the cookie sheets.

     5. Use a soup spoon to scoop the mixture into balls on the baking tray. This amount will make about 15 cookies of this size. You can make them smaller or larger of course. Set the mixture in balls or heaps on the tray and remember to allow for quite a lot of spreading, so not too near the edge or each other.

    6. Bake in the preheated oven for 10-15 minutes. Smaller ones will need less time, larger ones more of course. I think the ideal is a nicely browned edge so that the cookie is crisp at the edges but softer in the middle.


     7. Transfer them carefully onto a wire cooling rack to set and firm up. Once they are quite cool they can be stored in an airtight jar. Just how well they will keep will depend entirely on how many people can smell what's cooking and know where you keep the cookie jar.

The basic dough in this recipe could be the basis for all kinds of variations. I have tried chopped pecans and they worked well with wholemeal self-raising flour. Now I know,  whatever wholesome extras you tuck into a dough with this amount of sugar just won't produce healthy snack. Sometimes we need a treat, especially when there are endless days of rain when it is supposed to be summer. If you have read this far through a blog post with "Cookies" in the title, then I am sure you don't need me to suggest chocolate chips are worth considering. (By the way, I have given up my Web research into the ultimate choc chip cookie recipe  - I am just afraid I might find it!)
Whatever winning combination you come up with - remember it is good to share. Suggestions in the comments box please.

Monday, 13 June 2011

Summer Savouries

Summer is a good time to re-think our meal times. Longer evenings mean supper gets put back later and in order to keep going until then, tea-time needs upgrading from a basic cuppa and a biscuit affair. Of course the obvious refreshment for a summer afternoon outing is a cream tea but the idea of  weekend high tea with sandwiches and little savouries as well as scones and cakes is deliciously tempting. It  also can be handy to have some savoury pastries on hand ready for picnics. These could be scaled up to make large tarts but this size makes ideal finger food. What follows is not an exact recipe but more guidance on how to make these. There is something very satisfying about taking a recipe; tweaking and adapting to take into account what you have to hand and the tastes of those who you are cooking for, coming up with something that goes down a treat and  knowing you did it your way. Take these directions and make them your own - that it is just what I did. Having read so many recipes online and in magazines, it would be hard to pinpoint exactly where the idea(s) came from.

Thursday, 7 April 2011

Soup made with Lovage

Isn't it great to see the herbs bursting into leaf after their winter hibernation? The prospect of being able to help myself to handfuls of fresh herbs to add their zing to whatever I want to cook is enough to have me riffling through the recipe file for seasonal family favourites,. One of the best recipes for this time of the year is a potato soup flavoured with lovage. There are still plenty of last season's main crop potatoes around and for this, the best ones are the floury varieties, the kinds like Maris Piper that make good mash. But the main reason for making this recipe is that the lovage is now at least knee high in the herb patch, ( it will be 2 metres or more by autumn, if the wind, rain and weight of its leaves haven't made it flop over) and so ready to be picked.

I would grow lovage with its glossy bright green foliage and its yellow umbellifers for its looks alone. But to have it and not make the most of its flavour would be such a waste. The flavour is rather like celery with a mild curry twist. It's quite powerful so although the plant has an abundance of shiny leaves, you need to use them with some restraint until you get to know its strength. Known on the continent as 'the Maggi herb', a teaspoon or two of chopped lovage adds a savoury depth to sauces, casseroles and soup. And soup was what I made the first time I cooked with lovage. It was such a hit with the whole family that it has become a spring favourite ever since.


Tuesday, 15 February 2011

Molly Cake

Is it too soon to be thinking about spring cleaning? I thought I might start with the larder as in preparing for Christmas I often buy  ingredients that I might not use up for sometime afterwards. It might because everyone has had their fill of the kinds of recipes that need them or else everyone is trying to uphold the virtue of restraint and are simply not interested in cakes, biscuits or snacks of any kind. There are handfuls of dried fruits, nuts and that extra pack of dates we thought we might need; little bits of this and that. This presents the ideal circumstances for making Molly Cake.

I first came upon this cake at a John Lewis food court. Waiting to order a cup of tea, I decided it wouldn't hurt to cast a casual eye over the display on the cake shelves. And there it sat, a slice of Molly Cake with its label declaring it to be free of added refined sugar and fat, it was as good as saying "Look if you are gazing at the display in this case you are probably planning to eat cake and this is likely to be the healthiest option." I had never heard of Molly Cake before and having tried it and liked it well enough to want to try baking one I searched the internet for a recipe. Several sites had recipes and all were quite similar so I thought the most appropriate choice would be the recipe on the Waitrose site.

Like Glad Tidings it uses softened dates to bind the other ingredients together so along with the ground almonds and dried fruit it is just the thing to use up those remnants of Christmas baking. It is good at other times of the year too and I have substituted a pack of chopped dried fruit salad for the fruit element. The flavours of the dried peaches, apricots and pears worked really well.  Either way it is well worth making.
Please don't remind me that although it has no added refined sugar, the dried fruit and dates have sugars of their own and that it is not a low calorie snack. The lack of added fat and the wholemeal flour have to count for something, right?