Tuesday, 19 July 2011

Eyes on the competition

"There's some as big as marbles,  there's some as big as peas and then there's quite a lot of little ones."
Pop.
This quote is from a newspaper cartoon showing a pair of old men hanging over the garden fence and comparing their potato crops. According to my mother, the cartoon greatly amused my grandfather and so the quote has been handed down two generations now. It always springs to mind this time of year when our annual charity Potato Growing Competition comes around.
The rules are simple enough. You buy a seed potato for £1 back in early spring. You can only submit the crop of the special seed potatoes; no cheating with a heavier cropping variety. This year it was a variety called Casablanca. (Yes, that is very expensive for one seed potato but it is a charity fund-raiser.) 
You then have to grow the potato in a re-cycled container of your choosing - I usually use an old compost bag as it will exclude enough light to keep the potatoes from turning green. What soil compost or other growing medium and fertiliser you choose is up to you. Then on the day of the charity garden party you dig up all the potatoes from the plant and submit them for judging. There are various categories but of course the overall winner is the grower who has produced the heaviest crop. 
Now the most of  competitors are well acquainted. We arrange various other fund-raising events throughout the year and several of us have been involved with planning the garden party at which this competition is just one of a range of stalls and events.  Ever since the sale of the seed potatoes back in the spring there have been several committee meetings and over coffee afterwards there will be cautious probing and airy throw-away remarks about the amount of leaf growth and the emergence or not of flowers and whether these should be left on or nipped off. On the surface of it, the rivalry is all very cheerful and any claims to potato-growing prowess are all very modest, unless you closely observe the spouses of the competitors. There may be the merest flinch of an eyebrow or a barely perceptible shaking of the head.  Behind garden gates it is a different matter apparently. Eyes narrow in steely determination as the sights are set way beyond simply taking part and padding out the numbers, oh no. Nothing less than winning is intended. There are those of Irish stock  who feel that  the honour of their national heritage is at stake and those who have grown spuds for years who feel their experience and hard work should clearly count for something.  Happily I am not constrained by either of these.
Having spent the day before baking cakes for the afternoon tea and the morning helping set up the stalls, pricing preserves and plants, it was only when the  potato competition stall was set up next to mine that I remembered that I had an entry to present.  After dashing home for a quick bite of lunch, some scissors and more sticky labels, I went out and opened the recycled compost bag. I find harvesting potatoes is always something of a treasure hunt or a bran tub where you are allowed to find all the prizes. Unlike other fruit and veg, it is not the part you want that you get to see growing before your eyes. The real booty of the process is all growing  hidden from view, deep in the dark compost - or not, as the case may be. 
I was delighted and quite relieved therefore, to find several largish fist sized new potatoes as well as the inevitable tiny pearl sized ones. I suspected I already had my hands on the only prize I was going to get but that was more than good enough. Having seen the amount of slug munching the foliage had suffered I was glad to see all the tubers were smooth and free of any blemishes.

Creditable entry though mine was, I was right about the crop itself being my only prize. It was wonderful to see that one of the runners up was a girl aged about eight years old. When the judge, a local allotment holder, called her name she strode forward in true school assembly fashion, shook him by the hand, exchanged a few details on spud cultivation then received her certificate. She turned holding the certificate under her chin, print side facing outward and beamed at the audience, before  delightedly accepting her prize of a bright red tub trug. No feigned surprise, no diffidently waiting to be coaxed forward.  Now there, I thought, is someone who knows how to receive an award.
In spite of dismal weather the party had been well attended so having packed up, we finished the afternoon united in the euphoria of a job well done, appreciative of all the teamwork that raised an impressive sum for the clinic in Ethiopia. All headed home (possibly to spud suppers) the best of friends, at least until the announcement that the seed potatoes are on sale for next year's competition.

Tuesday, 12 July 2011

Hapa-Zome - giving it a bash

And when you're in a Slump, you're not in for much fun.
Un-slumping  yourself is not easily done.
Dr Seuss.

I found myself thinking of this gem of Seuss wisdom this morning.  Is it something to do with the time of year? The first flush of summer is past and the garden seems to be more work than pleasure; all dead-heading, weeding and very little harvesting - scarcely a handful of loganberries.  Sometimes, I figure, you have to "just do the work". After taking a long walk in the garden, pushing the mower, I thought that I would see if using the camera to "harvest" some shots would help to dispel the mental lethargy. It worked - the particular flowers and leaves that caught my eye reminded me of pressing flowers and from there it was a short leap to remembering watching Alys Fowler trying the craft of hapa-zome a way of creating leaf and flower prints using their own pigments by hammering them. I gathered some leaves and flowers to try it myself.

To make a start, I gathered together:
A hammer - oh yes, this would be fun
A thick board
Some  natural fibre fabric - unbleached calico 100% cotton.
Some thick card
The flowers and leaves

The basic technique is very easy. Simply spread the cloth over the board, lay the flowers and leaves on the fabric, cover with the card and hammer over it all. When you feel that you have  thoroughly bashed over all the vegetation, carefully lift away the card and see what has happened. Prepare to be delighted. Even on the first try, I was intrigued with how much of the pigment was transferred by this simple activity. I had tried making plant dyes with some successful results but nothing as instant as this.


It is such a revelation but there are some things I learned along the way. Some so obvious that I needed to have another go immediately.
  1. Choose fairly thin petals and leaves. Thicker ones tend to have a lot of sap or juice which dilutes the pigment. 
  2. Cut away any parts on the back of the flowers that are not going to imprint. (See below) These only bring a vaguely green squish to the end results.Not good.
  3. Make sure you hammer evenly all over the leaves and petals. It will help to have something see through to hammer over. Although I did get a second imprint on the card as well I think I would be prepared to sacrifice that for a good image on the fabric. 
  4. As far as possible try not to let the leaves and petals move during the process - so trim off any stems or stalks that stick up as this can make them move a little when they are hit and also keep peeking to check on progress to the absolute minimum. I was amazed at the lovely crisp outlines you can get if everything stays in one place.
  5. Make sure all the plant material is absolutely dry.
  6. Try putting the leaves with pronounced veins with the backs closest to the fabric. The purple sage leaves I used worked best this way as the veins gave them texture. The centre one was upper side down and that just came out as a splodge.
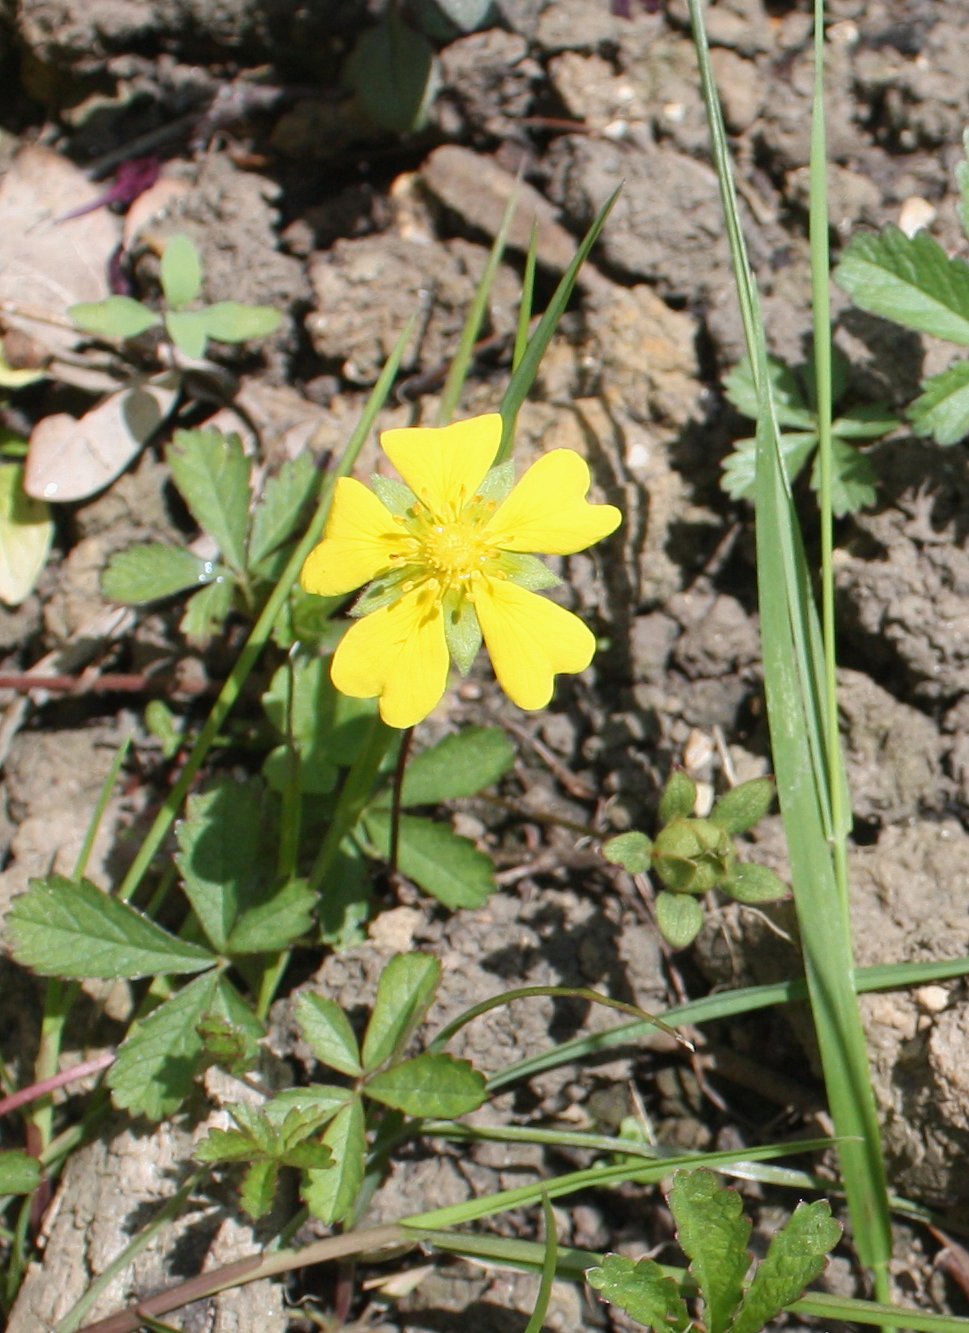
Some things change colour a little too - understandably the plant materials emerge bruised by the process and I found some of the pink flowers showed it and were more mauve than the original. The blue star shaped campanula was a great success and came up with crisp edges. As did the little yellow weed flowers. I don't know the name of this plant - I think it is some kind of potentilla - but I have a different name for it entirely (a name I am not prepared to put into print)  when I am trying to eradicate its thuggish invasion of almost every bed and border. I did notice the other day as I managed to dig up some of the long tap roots that they are a conspicuous red and might yield an interesting dye.
So another day another try, this time using flowers and leaves from herb robert. Yes, it is something of a weed here but it does have exquisitely shaped leaves which turn red. And the little pink  flowers are pretty. I trimmed back the tube behind the petals and of course this makes all the petals fall apart so it is a good idea to set the flowers in place before cutting the tube away - my botanical knowledge falls way short of knowing what this part of the flower is properly called. I found a pair of tweezers came in handy to rearrange the tiny petals.

This time I used a layer of greaseproof paper underneath the card so that I could lift the card off without disturbing the leaves. I found that I could also hammer on the greaseproof paper without the card.

Good results I thought - funny how the red leaves worked well but the green ones were a waste really.
My mind is starting to buzz now with ideas for using the prints and for experimenting with other plants and other fabrics. There is further blog inspiration for this technique here and here.
Go on, give it a bash - pun most decidedly intended! I am sure Dr Seuss would have approved of  it as a strategy for un-slumping.

Sunday, 3 July 2011

A Box of Mints

Even when the weather warms up, I usually like to have a hot drink at some point in the day. The perfect light and refreshing alternative to  a caffeine loaded 'cuppa' is mint tea, preferably made with fresh herbs. Having a planter full of mint by the back door acts as a growing tea caddy - and also stops the mint plants turning into invasive thugs and running rampant through everything else.

This all began with clearing out a shed, one of those places where things that "might come in handy some day" get to congregate and settle into rusty retirement along with various bits that didn't warrant a run to the tip in their own right. I came out to review progress just as HeWhoWasLoadingTheBoot ready for the tip run had picked up an old bicycle basket. I doubt either of us can even recall how long it is since anyone living here has owned a bike but I found myself saying "Ah, hang on a minute." I quickly popped some plant pots in it to stake my claim and we finished packing up and taking a car load to the local recycling centre.
By the time I got back to look at what I had salvaged, my imagination had taken off completely. I was thinking it would hold a wonderful collection of flourishing herbs each with its own stylish label, may be like these made from old spoons. Of course the pots would have to be tall and narrow; terracotta naturally. Long Toms would do perfectly. Ideally the pots would have 'vintage character' - a tracery of leached lime or a green patina of moss. I could even achieve either of these effects with a little time and trickery and some help from the internet. Then the mist lifted and reality drifted back into focus. All of that would mean postponing the project and leaving stuff lying about again and that was counter to the spirit of the afternoon. And after all this was hardly some unique wire basket picked up from a brocante stall in a French flea market - clearly I spend too much time on the internet and browsing the gift sections of upmarket garden centres. Let's be practical, resourceful and set to work with what is already close at hand. Line the basket and plant directly into it. 
With that in mind, I raided the potting shed for weed suppressant membrane and raked the shadiest patch of the lawn for some moss and set to work.
Using weed suppressant membrane to line the basket seemed a good idea as it will allow excessive moisture through but hold the compost in. I tackled it in much the same way as I would line a loaf tin with baking parchment. I measured out a rectangle by wrapping the membrane down one side, across the base and up the other side and repeating that from front to back. Having cut that out, I then cut in from each corner of  the rectangle to the corner of the base. This allowed some overlap at the corners. I cut out the very top of each corner as those corners just curl in and get in the way. 
To keep the lining in place I used twist ties threaded through the overlapping layers in the corners and around the basket uprights in each corner. If I had had some pieces of polystyrene I would have put a layer of them in the bottom for drainage and that would have been a good idea if I was going to plant herbs like sage, thyme and oregano but mint is quite happy with moisture around the roots so sharp drainage isn't crucial. 
 I filled the basket with a mixutre of multi-purpose compost, sifted garden compost made in our garden and also I added a couple of trowelfuls of ash and charcoal from where we had our last bonfire. Now black membrane doesn't look all that special - considering the dreamy ambitions I had for this project earlier on. So at this point I tucked moss between the wire of the basket and the membrane lining. 

I found that I had several varieties of mint in various little pots and thought they would make a good collection for this basket. 
Morrocan mint - ideal for mint tea but also good for cooking.
Lime mint - this adds a citrussy kick to the mint flavour.
Corsican mint - this is a tiny leaved mint with a creeping habit but no diminuition of the lovely mint fragrance
Peppermint - makes a lovely tea to settle an upset stomach
Eau-de-cologne mint - another lovely tea, this time for those times when your head feels muzzy and a headache seems imminent.
Culinary mint - this was the remnants of a pot of mint I had bought in the supermarket after the the frosts had sent the mint in the garden into hibernation. ( I had forgotten to pot some up for the kitchen windowsill in early autumn.)
So all of these plants went into the basket and then I simply had to water and wait - skills  all gardeners have to practise often.
Weeks later and the plants seem to be very happy with their new quarters - as shown at the top of this post.
 My favourite bit? The way that the Corsican mint has settled into the understorey below the others and has crept out down the side to colonise the moss. It even has enchanting tiny mauve flowers.

The old bicycle basket has all but disappeared now (and when I come to replant it in the future I will wirebrush it to remove the last bits of decrepit plastic) but the mint seems very happy and I am happy to have it by the back door, handy to nip off a few sprigs for tea. 


Sunday, 26 June 2011

Gardens Open

It is the season for summer fetes, village carnivals and open gardens. Of course the National Trust gardens and the listings in the NGS Yellow book are interesting, impressive, perhaps both but some little gems can be discovered by following the arrows directing you from a main road to a village where several residents have agreed to let curious passers-by wander around their gardens for a modest donation to a good cause. You park on the edge of the field designated as a temporary car park. You locate the first garden where someone gives you a copy of a hand-drawn map of the village and some friendly guidance. Then off you go, wandering along little lanes, drifting around gardens, bumping into fellow wanderers and somewhere along the way there may well be a plant stall or two and somewhere to have a cream tea. If the weather stays dry, it can be such a pleasant way to spend an afternoon. I am drawn by the chance to find what lies over the garden wall, especially if the wall happens to be mellow flint and brick, bounded by hollyhocks.

On Saturday I visited the gardens in Exton. There were roses. Purple ones.

And a lovely single red one.

In a tiny village nestling in a picturesque river valley, the gardens were set against stunning country side views.
But for all the harmonious planting schemes and meticulous grooming of the lawns and beds, the sight that stopped me in my tracks was a little meadow of ox-eye daisies by the river.


Friday, 24 June 2011

Just a bowl of cherries

According to an old song and an even older saying, that is what life is - just a bowl of cherries. At the moment  it  could well represent the amount of fruit that  the birds in our garden have been foiled from gobbling before it is properly ripe.
The cherries are a variety called Stella, a lusciously large, dark and juicy variety; at their sweetest and most delicious when picked fully ripe from the the tree. Well, that's how I like them. The pigeons are quite happy to harvest them when they are tiny, rock hard and bright green and the blackbirds only wait for the first hint of red. With the tree having the botanical name, Prunus Avium (translates from Latin as bird cherry) I suppose they feel entitled. As the person who carefully selected, planted and nurtured the tree, I feel entitled too. It is now too tall to net and the birds around here seem  as happy when surrounded by old CDs as any nineties DJ, so in order to salvage some fruit for us, I have resorted to covering some of the clusters with the legs of old tights as soon as the cherries start to turn colour. For several weeks it looks hideous on a tree that is almost in the middle of the garden but with even only a dozen or so branches weirdly clad in hosiery, we at least get some fruit to harvest. In fairness, more than the bowl above but not really enough to consider making jam. Just enough to enjoy fresh with a few to enjoy later. Making some tarts for the freezer seems a good idea. During the days when we used to be able to 'pick your own' in the cherry orchard up the road,  I copied out a recipe for a pudding that I have made and modified several times.  Never mind the posh name it had for the original recipe, it is really a Cherry and Almond Tart. If you don't care for the flavour of almonds then it can be adapted. See the notes below. Here then is its current incarnation.


Cherry and Almond Tart

You will need:
 For the pastry:
230g plain flour
half teaspoon salt
half teaspoon caster sugar
100g cold  unsalted butter cut into small pieces
45g lard or vegetable shortening
 50 ml (approx) of ice cold water.

For the filling:
250 g cherries
120g butter 
120g caster sugar 
120g ground almonds
2 tablespoons plain flour
2 eggs 
a few drops almond essence or almond liqueur (optional)

For the glaze:
120g icing sugar
2 teaspoons of water.

You will need to:
Make up the pastry by putting the flour ( mixed with the salt and sugar), butter and lard or shortening in a food processor and whizz till the mix resembles bread crumbs. No food processor? Then put the flour and fats into a large bowl and rub the mix between your thumbs and fingertips until it is thoroughly mixed and again, it looks like breadcrumbs when this has happened. Try to keep the mixture away from the warmth of the palms of your hands as much as possible. Now add the chilled water a small amount at time until there is just enough to hold the mix together. With a food processor, you can trickle the water in through the lid as the blade is running and you can see and switch off as soon as it makes one large lump. Without the processor you can use a table knife to cut the water little by little into the mix. Either way, quickly pat the finished dough into a thick circle, place in a bowl, cover with a damp cloth and pop it into the fridge for an hour. 

Prepare the filling. Mix together the butter and castor sugar until light and fluffy. Beat and add the eggs and almond essence. Mix well. Gradually add the flour and ground almonds. Set this batter aside and then wash, halve and stone the cherries.

Assemble the tart(s). Prehat the oven to 200 deg C. Put cookie sheets into heat as well.  Roll out the pastry to about half a cm thick. I had enough pastry and filling to make one 22cm tart and four smaller ones about 10 cm for which I used a Yorkshire pudding tray. Line the flan tins or pie plates with the pastry and let it rest for ten minutes. Then place the cherries cut side down over the base of the tarts. Pour the filling batter over the fruit and tap the tins sharply to encourage it to level out.  Place them on the heated cookie sheets in the oven. This helps the base to crisp. Bake for approx 30 minutes - slightly less for smaller tarts - until the filling has risen slightly and browned and the pastry is cooked. Remove from the oven and place on a wire rack. 

 To glaze: Sift the icing sugar and mix with the water to make a stiff paste. Spoon onto the tart while it is still hot from the oven and gently swirl with the back of the spoon or a pallette knife so that the icing spreads evenly over the top of the filling. Allow to set and cool. Enjoy!

 Freezer notes; Any surplus pastry dough will freeze well. I find it best to roll and cut out useful sized circles before freezing. Not only can you take out just what you need, but it thaws much faster and saves all the hassle of rolling and clearing up yet another time. 
 The baked tarts also freeze well but leave the glazing off  as it tends to go soggy when thawing and you loose the crisp sweet bite.  You could use boiling water to make the glaze to put on the thawed tarts. I like to freeze the 10cm size as they are ideal for a 'lazy' dessert and it is a comforting thought to have something reasonably impressive and practically table-ready for pudding. 

Don't like almond flavours? Well you can always leave out the essence or liqueur and substitute dessicated coconut for the ground almonds. Any devotee of the Cherry Ripe bar (and these head my Most Missed Oz Food list now that Vegemite is readily available here) will tell you that cherries and coconut are an inspired combination. And with that in mind you will probably want to figure a way to add an element of dark chocolate to the dessert. Perhaps an artistic drizzle of chocolate sauce, chocolate pastry base or some chocolate dipped cherries on the side.
Does this dessert deserve to be entitled Flan Danois? Mm, possibly.


Sunday, 19 June 2011

Cookies - Something old, Something new

 Here at The Hebe Bee, this is post number 50
Surely that is a milestone worth celebrating with a little treat. Let me share one with you. For very little effort you could make up a batch of Cranberry cookies and fill your kitchen with the most heavenly smell which is nearly (but not quite) as good as the taste.   As they cool and set, make a pot of your favourite brew - tea, coffee, hot chocolate, the choice is yours - and find someone to share a delicious moment.
As a child I never had 'cookies'. Absolutely true. Treats like these were called biscuits and most often they were home-made.  Do you find that nothing quite nourishes the inner child like something your mum used to make? I'll admit I'm not averse to shop bought cookies, but making my own means I can hit the ideal medium between the chewy texture of the five-in-a-bag cookie and the crisp crunch of the ones that my mother used to make.

The Something New in the post title refers to Flora Cuisine, the oil component in the following recipe. ( No, I am not being sponsored!) Some weeks back it was being promoted in a local supermarket and I was handed a sample to try. A little later, a recipe for cinnamon and raisin cookies appeared in an advertisement in another store's freebie magazine. This recipe is my tweak on that one. The Something Old is the  flavour combination of cranberries, cinnamon and orange which is a particular favourite of mine.

Cranberry, Orange and Cinnamon Cookies
 You will need:


  • 70g Flora Cuisine
  • 55g castor sugar
  • 100g soft brown sugar
  • 175g Self-raising Flour 
  • 1  medium egg
  • grated zest of an orange
  • 2 teaspoons cinnamon
  • 1 teaspoon of vanilla essence (or vanilla powder)
  • 90g dried cranberries
  • 1/2 teaspoon bicarbonate of soda
What you need to do: 
  1. Preheat the oven to 190 deg C. Lightly grease 2 cookie sheets. You could use the Flora Cuisine for this. 
  2. Sift together the flour, cinnamon and bicarb into a large bowl.
  3. Roughly chop about half the dried cranberries then add all 90g of them to the bowl.
  4. Beat the egg and add it. Then add all the remaining ingredients. It doesn't really matter about the order just place all the ingredients into the bowl and start to mix.
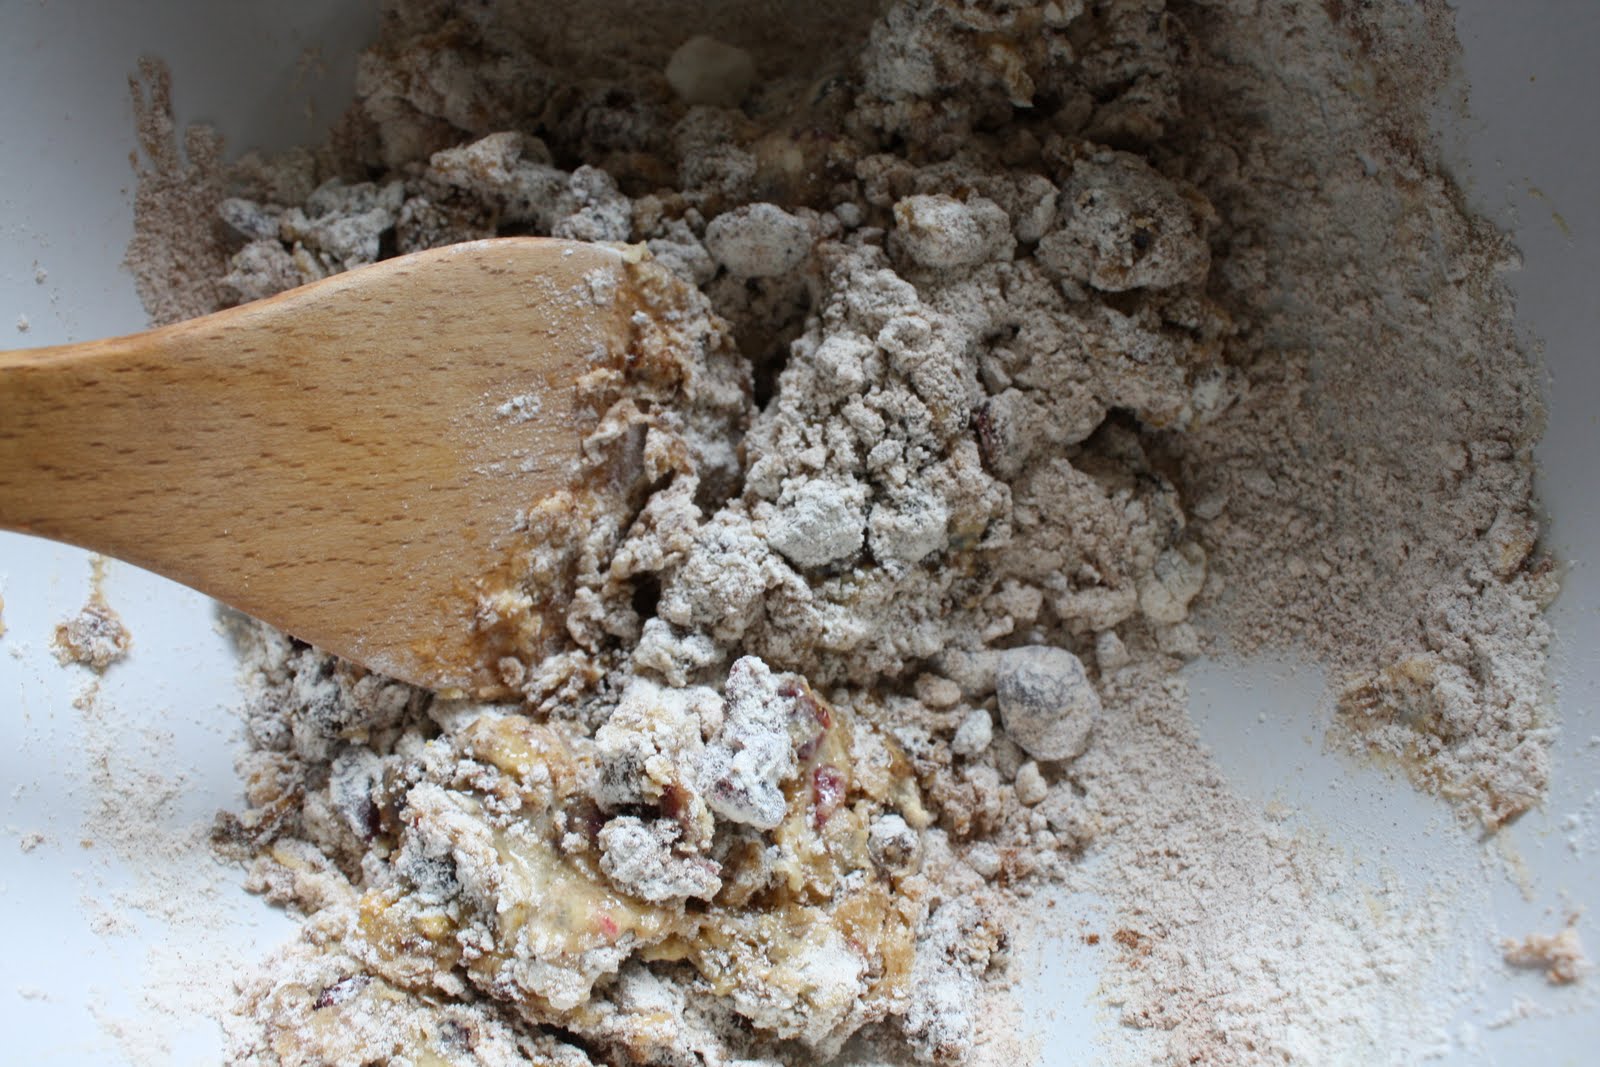
At first it seems far too dry to make into cookie dough.
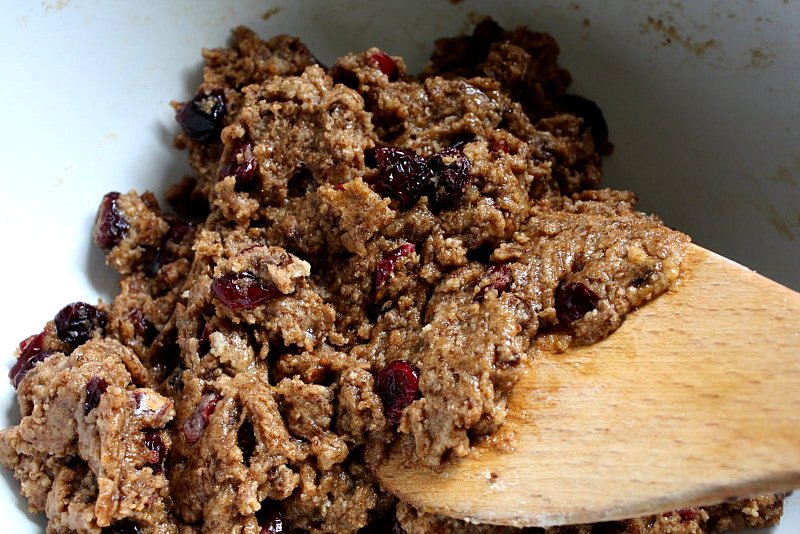
But keep mixing and eventually it all sticks together and a smoother, shinier dough studded with cranberries is ready to be dolloped onto the cookie sheets.

     5. Use a soup spoon to scoop the mixture into balls on the baking tray. This amount will make about 15 cookies of this size. You can make them smaller or larger of course. Set the mixture in balls or heaps on the tray and remember to allow for quite a lot of spreading, so not too near the edge or each other.

    6. Bake in the preheated oven for 10-15 minutes. Smaller ones will need less time, larger ones more of course. I think the ideal is a nicely browned edge so that the cookie is crisp at the edges but softer in the middle.


     7. Transfer them carefully onto a wire cooling rack to set and firm up. Once they are quite cool they can be stored in an airtight jar. Just how well they will keep will depend entirely on how many people can smell what's cooking and know where you keep the cookie jar.

The basic dough in this recipe could be the basis for all kinds of variations. I have tried chopped pecans and they worked well with wholemeal self-raising flour. Now I know,  whatever wholesome extras you tuck into a dough with this amount of sugar just won't produce healthy snack. Sometimes we need a treat, especially when there are endless days of rain when it is supposed to be summer. If you have read this far through a blog post with "Cookies" in the title, then I am sure you don't need me to suggest chocolate chips are worth considering. (By the way, I have given up my Web research into the ultimate choc chip cookie recipe  - I am just afraid I might find it!)
Whatever winning combination you come up with - remember it is good to share. Suggestions in the comments box please.

Friday, 17 June 2011

Sitting comfortably? A Chair Makeover

We have two chairs which we had given a home to when some office somewhere was closed or revamped. So long ago now neither of us is very sure about just where they came from.

Perfectly "serviceable",  quite comfortable for sitting at a desk, and now getting a bit shabby( but not in a chic way.)

 I happened to be standing next to one of them, waiting on the phone, when it occured to me to imagine the fabric covering the back and seat in something like a zany zebra print. It would work; give the chair a whole new personality. The black frame-work and polished wood arm rests are fairly classic office design. By the time all the continuing apologies for being kept waiting and further assurances that my call was valued and that my patience would soon be rewarded with the attention of an advisor, finally came to an end, I had worked out how to take off the seat and the backrest and how many pieces were sewn together to make up the upholstery.
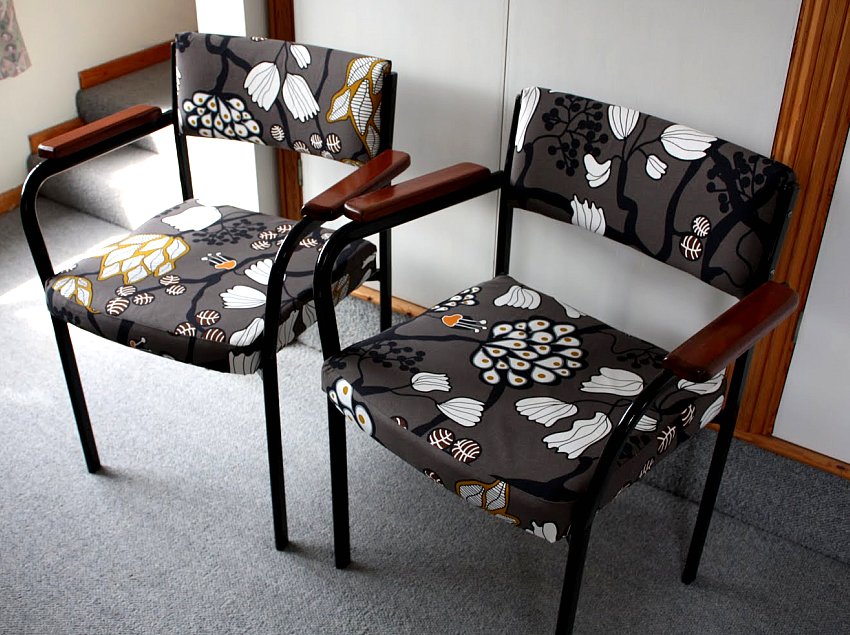
 HeWhoUsesTheOtherChair seemed to have reservations about a zebra print but on a trip to the big blue store we agreed on one of their livelier prints. The least fun bit of the project was pulling out all the staples that held the fabric onto the seat and backrest. I needed those pieces to come off intact so that I could use them as patterns to cut out the new fabric. That done though, the rest was a breeze. Some work on the sewing machine to overcast the edges for the backrest and to sew the seam around the seat, then using the gun tacker to staple them onto the chair pieces and finally  reassembling the chair. Ta-dah!
One office chair with a little  pizzazz. So good, so easy and enough fabric left over we did the other one.
Not entirely a UseStuffIAlreadyHave project but for the cost of a metre of very inexpensive furnishing fabric we have 2 chairs with a new lease of life.
Do they match the decor in any of the rooms? Um, well not exactly - they are just fun pieces in their own right.