This part of the tutorial follows on from part 1's revelation on how to fold up the throw to fit into the cushion - should you have decided to make one. This part 2 goes through my process of making one. Apologies to all of you whose logic says the making bit should come first because you can hardly fold it up if you haven't got a throw/cushion transformer in the first place. I just needed to be sure it would work before I put in the effort to make one; it also helped to make sense of and get the construction right.
I used:
1. A bought microfibre throw - 176cm x 146 cm (regardless of what the label said)
2. A piece of unbleached calico - 50cm x 52cm - for the cushion back cover.
3. Crocheted squares joined to make large square - 50cm x 50cm for the cushion front.
4. Cream jersey fabric 51cm x 51cm - to line the cushion front.
You may decide that actually you don't need a cushion back or lining for the front and you could just use a piece of coordinating furnishing fabric for the cushion front cover - it would make the whole process a little simpler.
Steps I took:
1. Fold down one of the longer sides of the cushion back by 2cms and press it so that you have a 50x50 square. Place this right side up centrally on one the shorter sides of the throw with the folded edge furthest from the top edge of the throw. ( Much as I was unimpressed with the fancy edge on the throw I bought I couldn't quite bring myself to trim off the eyelets and scallops - I figured some would end up in the seam allowance any way.)
2. Stitch along the folded hem of the right side of the cushion back. You could use the sewing machine for this. Or do as I did and find a seat by a sunny window and stitch it by hand.
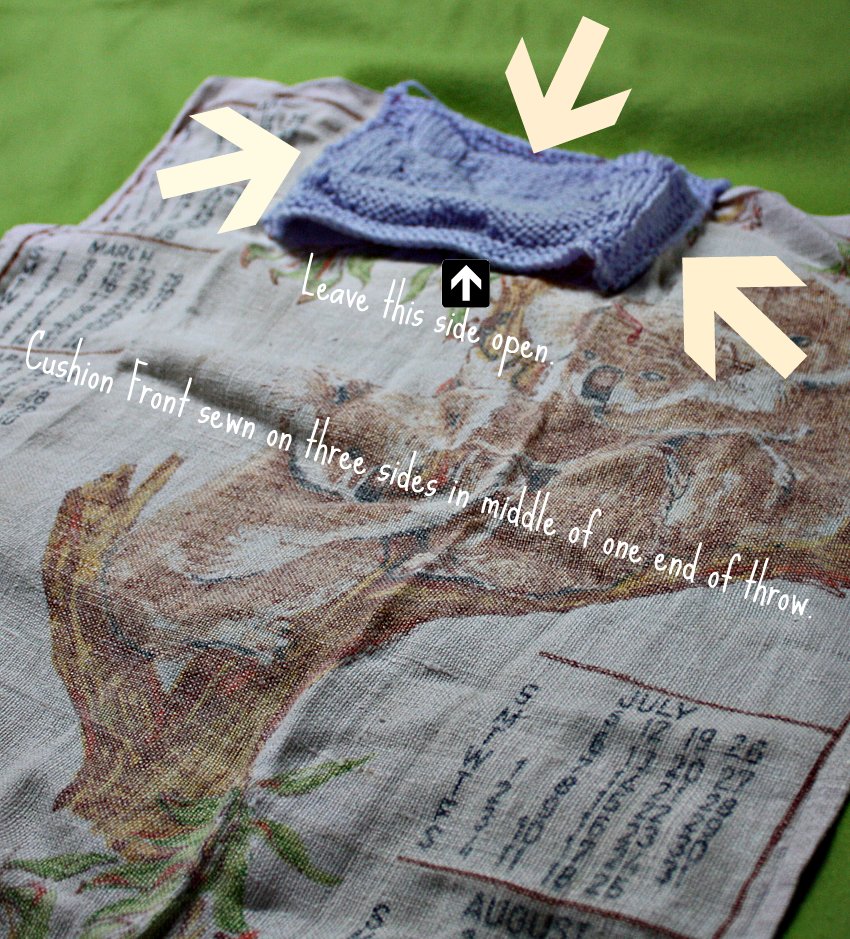
3. Now layer up all four of the elements as shown remembering to note any right and wrong sides. If you are just putting a front as I did when I made my mock up in Part 1, just lay that right-side down (wrong side up)on the centre of one of the short sides of the throw. Please note that the cushion back and front will be aligned edge to edge and the lining will overhang a little all round; I just staggered them out like this for illustration of the order and orientation.
4. I placed the crochet front on top of the calico back, wrong side up as shown above. I thoroughly recommend that you tack the layers at this stage -1. throw-2. calico back-3. cushion front, firmly into place - (yes, I know more hand sewing, but I had several layers one of which was quite thick and it just seemed a good way of saving unpicking if things started to shift around or ripple ahead during the stitching. Decide for yourself)
5. You might like to refer to the previous tutorial Part 1 to see just what needs to be stitched now. Basically you need to sew three sides of the square allowing about a half a centimetre seam allowance for the back and front of the cushion. Setting the sewing machine to a wide zigzag stitch and easing off the tension enabled me to sew the three sides to secure this. See the diagram in
Part 1. You will need to sew along one of the sides parallel to the longest sides, then along the side nearest the short end and down the other side parallel to the longest sides. Make sure you secure the beginning and end well as this is likely to take the most wear and tear in use. Try turning the cushion cover inside out to make sure that the back layer has been caught in the seam allowance. You want it to look good when it is being simply a cushion, after all.

6. I then used the zigzag to neaten the jersey lining for the front and pinned that over the seam securing the cushion front.You can see this in the picture above. I don't have an over-locker or serger - either of which might also make a neat seam. Depending on how thick the layers are and how rugged your sewing machine is you could tack and zigzag that layer into place and more intrepid, competent souls than I am will probably cope with both steps 5 & 6 in one seam. I decided to use hand stitching again and blanket stitched my way around to secure the front lining on three sides and then slip stitched the open side crochet and lining layers together.
7. Once you have checked all these seams are fine, you're done with the sewing. Now refer to Tutorial Part 1 and follow the instructions to fold the throw into a cushion and just check that it all looks good either way.
Personally I am wondering if a crocheted border around the front wouldn't set it off a little better. Or is it simply because it has taken me so long to finish such a simple project that I don't want to let it go?
And finally a tiny tutorial on how to unfold the cushion to use it as a throw, just in case it isn't immediately obvious from tutorial part 1.
Step 1
Reach into the open end of the cushion and pull out the folded throw.
Step 2
Reach up into the cushion and grab the top two corners from the inside and turn the cover inside out. Then simply shake the throw gently to let all the folds open out.
You will see the wrong side of the cushion front is now visible which is why I lined my crocheted square.
This project has been a long time in completing and I felt that having posted Part 1 I had to complete Part 2 before moving on to some thing else. Phew! At least the crocheted squares have been put to a practical use.
New Year, new subject then.


 A
A